Service Hotline
+1 4152729688
2023-09-21 09:41:27
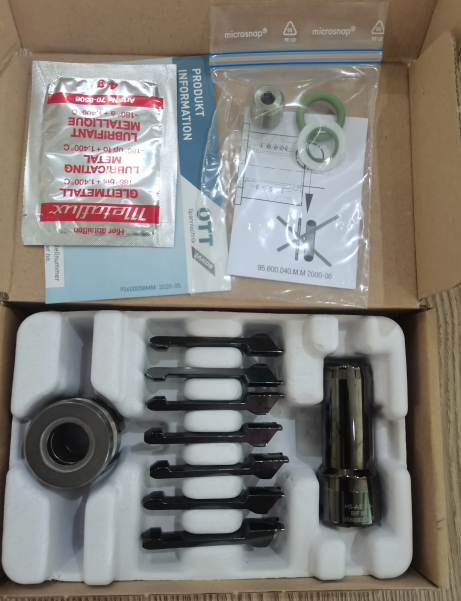
OTT-JAKOB broach claw is one of the important tools in machine tool processing, and the correct installation has a direct impact on processing quality and production efficiency. Correct installation can ensure accurate alignment and clamping between the gripper and the tool, avoid displacement of the tool during the cutting process, and thus ensure the accuracy and quality of the product. The following will provide a detailed introduction to the installation steps and precautions of the broach clamp claw.
1. Determine the installation position of the gripper: Firstly, it is necessary to select a suitable gripper based on the shape and size of the workpiece, and determine the installation position of the gripper to ensure that the gripper can grip the workpiece and fit properly with the cutting tool.
2. Cleaning the installation surface: Clean and wipe the position where the clamping jaws are installed to ensure that the working surface is clean and free of oil.
3. Install clamping jaws: Align the clamping jaws with the working surface and tighten the clamping jaws on the working surface under the guidance of the fastening bolts.
4. Clamping and disassembling tool: When installing the clamping jaws, it is necessary to use a clamping and disassembling tool to clamp the barrel mouth of the clamping jaws, remove or install the clamping bolt or hook, and pay attention to lightly tapping with hands or a wooden rod when disassembling the device to prevent damage to the clamping bolt or clamping device.
5. Check the quality of the clamping jaw working surface: After installing the clamping jaw, it is necessary to check the installation position of the clamping jaw to ensure that the installation position of the clamping jaw is flat and free from any deviation or other issues. If quality issues are found during inspection, the clamping jaws must be reinstalled.
6. Tool installation: Before installing the tool, it is necessary to adjust the clamping jaw to the correct position and clamping force, ensure that the clamping position of the clamping jaw meets the machining requirements, and then place the tool into the clamping hole. Assemble all components as required to ensure the proximity and straightness of the tool, and ensure machining accuracy. Finally, use the progressive force code torque tool for adjustment and fixation.
Precautions:
1. The installation of the clamping jaws should be tightened firmly and there should be no looseness.
2. Before starting the machine tool, it is necessary to check the status of the gripper and tool. Whether the stretching degree, clamping force, and fixing tightness are appropriate.
3. Before selecting the cutting tool, it is necessary to evaluate the cutting conditions of the workpiece in advance, select the appropriate cutting edge, contour, and tool clamping method, and set the processing parameters reasonably.
4. When hydraulic and pneumatic fixtures are equipped with oil cylinders or cylinders, attention should be paid to installation and adjustment. During operation, lubricating oil penetrating agents should be regularly added to maintain good working performance.
By performing the above steps, the installation of the broach clamping jaws can be made more precise, and the clamping force can be more stable, thereby maintaining machining accuracy. For fixture installation in industrial production, it is necessary to have relevant workers with certain installation experience and skills to carry out installation operations to ensure accuracy.
The above content introduces how to install OTT-JAKOB claw and the issues in the OTT claw installation tutorial. In addition, ODJ-Tech Global LLC specializes in selling brand new original imported OTT-JAKOB broach claws, and promises to sell all products with brand new original imports. At the same time, we provide customers with quotation, selection, product information and other services. For more product and technical information needs, please go to the official website of ODJ-Tech Global LLC to search for contact information and further consult and understand.
